|
5: Build a Rain Barrel
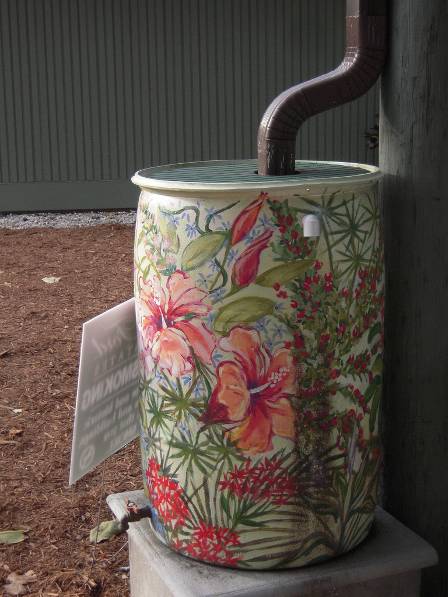
A rain barrel is a simple rainwater collector that captures and stores a portion of the runoff from a roof downspout for non-potable, exterior uses, such as irrigation. Rain barrels come in a wide variety of materials, designs, and colors. Common sizes for residential use are 55 gallons and 90 gallons. They are usually installed on the ground next to buildings.
Benefits
Using rain barrels to temporarily store and reuse rainwater can conserve drinking water by providing a chlorine-free water source that your plants will prefer. You will also save money on your water bills each year. Rain barrels are a great way to remind you of the advantages of conserving water given the many ways you use it throughout your day.
Unfortunately, due to their small size as compared to the average roof and average rainfall and patterns in the Five Counties area – 6 months on, 6 months off – some pollutants from your roof may be captured in your rain barrel. In the Five Counties area, average annual rainfall ranges between 10 to 120 inches of rain per year. This means that for every 1,000 square feet of roof area, 6,000 to over 73,000 gallons of runoff may be generated annually. Because of their capacity, rain barrels will not provide enough reduction in annual runoff to significantly protect water resources. In order for rainwater harvesting to be used as a stormwater management facility, a much larger cistern system is needed. Rain barrels are an easy and great place to start and will still save water and money.
Siting
To determine if a rain barrel is right for your property, the first step is to identify your site’s drainage conditions. Answer the questions below as you walk around your property.
Where would you like to locate your rain barrel?
Install your rain barrel based on where you will use the water in your yard. Keep in mind that it may be possible to rehang the gutter and move the downspout to a more convenient location. The rain barrel is usually located at the base of one of the downspouts draining your roof gutter.
Since a rain barrel is its own impervious surface and would, in most places in the Five Counties area, fill up just from rain falling into it over the course of a single year, when possible place it on an existing impervious area like sidewalks and driveways instead over a landscaped area that provides its own form of stormwater management for your property.
Where does that downspout currently drain?
The downspout you will divert to your rain barrel probably drains into a standpipe or to your yard. This is the stormwater discharge point and is the same location where the rain barrel overflow should go.
Design
Rainwater collection using a rain barrel for residential, external, non-potable uses such as irrigation, does not require a county permit, but there are still design considerations to follow.
Overflow
All rainwater collection systems must have an overflow to a safe disposal location. A 55-gallon rain barrel captures only a small fraction of annual rainfall, even from small roof areas. Even if you have multiple rain barrels connected together, you still should have an overflow to a safe discharge location.
If your rain barrel overflows into the standpipe, be sure the overflow pipe is attached and sealed to the standpipe opening. If the downspout to be connected to your rain barrel currently drains to an area in your yard like a rain garden or downspout disconnection area where runoff infiltrates into the ground (surface infiltration), the overflow from your rain barrel should also discharge to that location. If the downspout currently drains to a standpipe and you wish to change your overflow disposal to surface infiltration in your yard, see “Navigating the 5C Program’s Stormwater Management Guidance” to find the right guidance documents (e.g. rain garden, disconnect impervious areas).
Safety Considerations
Your rain barrel must be secured on a firm, level surface. A full 55-gallon rain barrel weighs over 400 lbs.; so tipping is a risk if it’s unsecured or on uneven ground. If water in your barrel is likely to freeze, expansion may cause the bottom to bow outwards, which may also be a tipping hazard.
- The barrel should be a food-grade, structurally sound container made to hold liquid. Some containers, such as trash cans, are not designed to withstand the pressure of the water. If re-using a barrel, check for odors that indicate that it may have been used to store chemicals or toxic substances. If it smells strange, avoid using it.
- The barrel should have a lid and a sturdy fine mesh covering all openings to prevent small animals and mosquitoes from getting inside (1-millimeter or smaller mesh to keep out mosquitoes).
- The water from the rain barrel should never be used for drinking, cooking, or other potable uses.
- Your rain barrel should overflow to a safe discharge point.
- If you use a moss-control product on your roof, be sure to use a control product that is garden- and waterway-safe. Look for products containing soaps, fatty acids, or ferrous sulfate. Avoid products with zinc sulfate.
- If you plan to change your downspout to a rain chain, choose stainless steel or fired clay/pottery. Avoid copper, galvanized steel, and iron. Rain moving over these materials picks up soluble portions (those that can be dissolved in water) of the metals that pollute water and can harm fish and other aquatic life.
- The barrel should be opaque, not clear/see-through. Algae is likely to grow in a clear barrel and become a maintenance issue. Paint that will adhere to plastic should be available at a local store.
Larger or more complex systems
More complex rainwater collection systems have a much larger storage container (a cistern), and/or use pumps to move water to desired locations. Some use their captured rain water indoors for toilet flushing. These projects involve factors beyond what is applicable to simple rain barrels, such as plumbing and electrical work, soil excavation, or concrete foundations and other structural components. For rainwater collection projects of this scale, you should consult a professional to review design, construction, and safety considerations. For more information about rainwater harvesting for indoors or using cisterns, see ”6 Harvest Rainwater in Cisterns”.
Construction
Many nurseries and yard supply stores sell fully assembled rain barrels. But you can get a regular barrel and convert it into a rain barrel yourself. Assemble your tools and supplies, then follow the construction steps below.
Tools
- drill
- inch hole saw for overflow pipe
(see Figure 1)
- one-inch spade bit for spigot
- tin snips or heavy-duty scissors
- adjustable wrench
- utility knife
- safety glasses
To disconnect your downspout to your rain barrel:
- tape measure
- hacksaw
- drill
- screwdriver or nut driver
- pliers or crimpers
Materials
- One 55 to 90-gallon food grade plastic, opaque barrel (can be found at local restaurant suppliers, nurseries, or gardening supply stores, or online)
Find the following items at most plumbing or hardware stores:
- hose spigot with 3/4 inch threaded inlet and 3/4 inch male hose end
- two 3/4 inch galvanized locknuts to secure spigot from the inside of the barrel
- four 1-inch (opening) washers to provide rigid surface to fasten hose bib
- Teflon tape
- silicon adhesive or outdoor caulking
- two 8”x 8” x 12” concrete or wooden blocks
- window screen mesh: 1)enough to cover the barrel opening; and 2) small enough mesh to exclude mosquitoes (1-millimeter or smaller mesh)
- downspout elbow to route the downspout to the barrel
- clincher strap (attaches downspout and barrel to house); a water heater strap rated for outdoor use can be used to secure the barrel
- small pieces of wood blocking to use behind clincher strap (if necessary)
- any additional materials necessary for the overflow location (see Overflow section above)
- 1/4” #6 sheet metal screws for downspout
- 3/4” screws for clincher strap
- 2” overflow pipe fittings
Construction Steps
1: Build an Inlet
Create an opening with fine screening through which the rain barrel will collect water from the downspout elbow. This can be a single screened opening large enough to accommodate the downspout elbow (as shown in the photo at the top of this guide), or a series of smaller screened openings directly in the top of the barrel.
2: Build an Overflow
Drill a hole near the top of the barrel to accommodate an overflow pipe that is at least 2 inches in diameter. If the overflow pipe elbow seals and seats securely, it can be threaded directly into the barrel opening. If not, it should be secured with washers on both sides of the barrel and a nut on the inside. Use Teflon tape around the threads and a bead of silicon caulking around the opening to ensure a tight seal.
3: Provide a Foundation
Create a raised, stable, level base (like concrete blocks) for the rain barrel to sit on. You might want to test stability by filling the rain barrel with water before attaching to your structure. A full rain barrel is very heavy and tipping is a risk if it’s unsecured (unstrapped) or on an uneven surface.
4: Redirect the Downspout
Be sure that the steps above are complete and that the rain barrel is where you want it. Put the barrel into place to make sure you know where the top of it will sit. Cut the downspout with a hacksaw so that the elbow will sit just above the rain barrel inlet. Attach the elbow over the downspout with a screw and secure the downspout to the house with the strap. Be sure that the end of the downspout goes on the inside of the elbow section to avoid leaks.
5: Attach Barrel
Set up the barrel beneath the elbow and secure the barrel to the house with a water heater strap rated for outdoor use. Cut and attach the overflow pipe to the overflow elbow and direct to the existing discharge location.
6: Build an Outlet
Drill a hole 4 – 6” above the bottom of the empty barrel to attach the drain spigot. Placing the spigot a little too high will create a place in the bottom of your rain barrel for dirt and other debris that comes off your roof. If the spigot seals and seats securely, it can be threaded directly into the barrel opening. If not, it should be secured with washers on both sides of the barrel and a nut on the inside. Use Teflon tape around the threads and a bead of silicon caulking around the opening to ensure a tight seal.
7: Use the Water
After a rainfall, fill a watering can using the bottom spigot or attach a hose to use the water where it’s needed.
Maintenance
Simple maintenance of your rain barrel can prevent problems.
- Clean gutters at least twice a year, more often if you have trees near your roof.
- Make sure gutters are tilted to direct water to downspouts and fix low spots or sagging areas along the gutter line with spikes or place new hangers as needed.
- Make sure roof flashing directs water into the gutter.
- Make sure all parts are securely fastened together and the rain barrel is securely fastened to the building.
- Clean out the rain barrel and check for leaks at least once a year. Caulk any gutter, downspout, barrel, and overflow leaks and holes.
- Check and clear downspout elbows, rain barrel screening, and overflow to prevent clogging.
- Make sure the rain barrel remains securely screened to prevent mosquito entry. Mosquitoes can also be controlled by adding a few goldfish to your barrel every so often.
- If overflow is to a surface infiltration area (e.g. rain garden or downspout disconnection area), monitor the overflow area and regrade the soil if necessary to make sure that water drains away from structures and does not flow onto pavement, sidewalks, or neighboring properties.
Download/View the 5C Program Stormwater Management Handbook:
Download by Chapters:
For more information, contact us
This document was adapted from the City of Portland Bureau of Environmental Resources Publication “How to Manage Stormwater: Rain Barrels” Document #BS0721. ©2012. Five Counties Salmonid Conservation Program and Green Girl Land Development Solutions. This publication may be photocopied or reprinted in its entirety for noncommercial purposes. This publication is available in an accessible format on our web site at http://www.5counties.org/docs.htm. No risk or liability by either of these organizations shall be assumed for information offered in this document.
Back to Land Use Planning page
Back to Programs Page
|